My MotoVlog Filming Travel Gear
As a minimalist traveler, it’s always tricky packing the right filming equipment especially when boarding a plane and refusing to check in luggage. And as promised from my previous blog post, I will share my minimalist travel film gear setup. Creating a minimalist video gear travel set reduces not only precious luggage space but also saves you a lot of time and money. I am all about saving you time and money as you see in my financial freedom blogs.
I only bring a few items, but they are enough to create great videos. So let’s start from the top.
For my Helmet camera setup I use a chin mount with a GoPro.
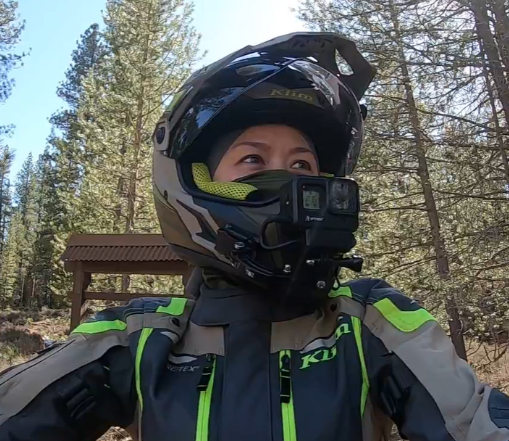
I find this point of view (POV) has the best angle. Below is the chin mount that I currently use.
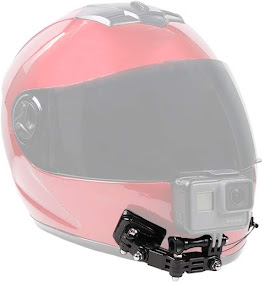
Prior to using this type of mount, I was using the Dango gripper mount,
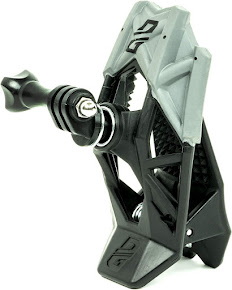
which works perfectly, especially if you are renting helmets overseas. Because it’s an easy on and off clip mount.
But at some point I have decided to try a stick-on mount on my own helmet so that’s why I now have the stick-on mount. I like the new setup better because I have a better range of motion. With the Dango mount I can’t look down because the clip sticks out low under your chin and it prevents you from nodding your head down.
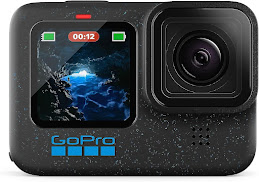
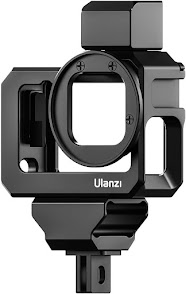
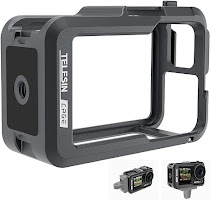
I do not have action camera preferences, but I do use a GoPro because it goes on sale and I like getting a deal. I use a generic media case to house the GoPro because if you use the GoPro Media Mod case it is difficult to switch out batteries when filming for a long period of time.
This is the case that allows you to switch batteries easily. This proves to be highly useful while on the road and you are continuously filming. I know that I can connect the camera to a power source but that means having to take a battery pack to my helmet which I do not want to do, or to be connected to the bike with a cable which can be a pain and could snag when I stand up.
(All images have clickable affiliated links. This is a reader-supported blog, so we get a commission when you purchase through the links provided.)
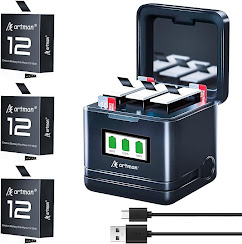
I always buy at least 3 sets of these spare battery packs when I change GoPros because I tend to film all day rides/moto camps/moto travel. Sometimes there’s just nowhere to charge your camera. I’ve had good luck with the Artman batteries shown below. They also have the enduro version which is supposedly longer lasting and has a better temperature tolerance range.
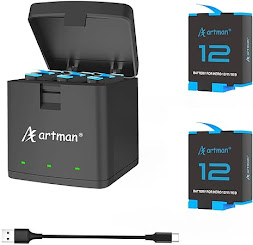
They do have the regular blue version as well if you prefer.
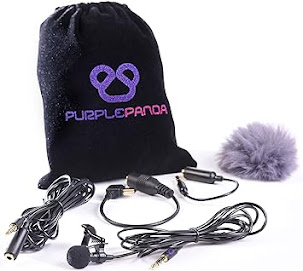
If you use this vlogging case instead of the media mod, you will need to use the GoPro Mic Adapter so that you can use an external microphone.
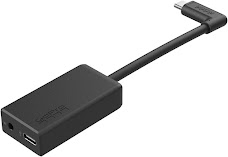
You most likely will need a TRRS to TRS microphone adapter in order for your external mic to work with GoPro. This external mic already comes with that adapter and works pretty well.
Now that the Helmet camera is set up. It’s time to show you my bike camera setup.
I used to have so many cameras mounted on the bike, but after the theft incident, I didn’t bother to replace most of my equipment. So now, I only mount one camera on the bike.
I use a DJI action camera, solely because I wanted to try a different brand.
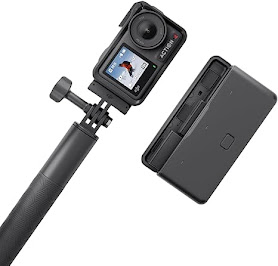
This already comes with extra batteries. When I use my own bike, the cameras I mount on the bike are connected to constant power. However, when traveling and renting bikes, it is helpful to have spare batteries, but not necessary. As I do not usually keep that camera rolling all the time.
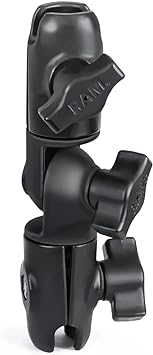
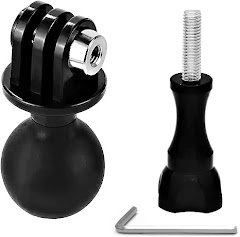
I use a RAM arm and claw 3 piece setup like these below to mount this camera on the handlebar.
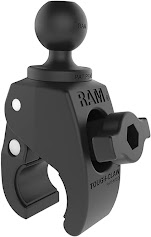
This camera is usually set up on the bike but facing me, so that the viewers see me sometimes and not just the environment.
I also bring a drone to get epic scenery shots. I try to use it as much as I can to justify the weight, since it adds a bit of weight to my pack, but in certain places like National Parks and most tourist traveled places and the like, flying a drone isn’t allowed. Just keep that in mind.
I have the DJI Mavic Air 2 and it’s been working out fine for me, so I haven’t found a reason to upgrade.
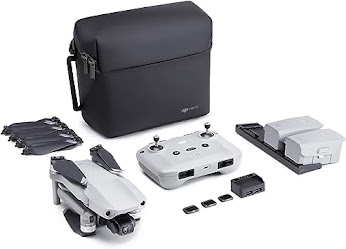
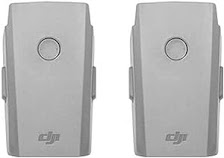
If you fly them a lot, it would be helpful to have more spare batteries like these, because sometimes, there’s just nowhere to charge your drone batteries, i.e. when motocamping especially.
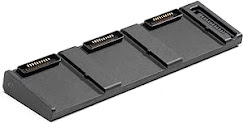
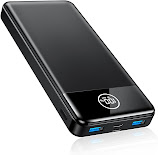
It’s extremely useful to pack a few of these portable chargers with you when traveling. There had been one too many times that I needed to recharge while on the road.
I also carry a portable tripod that can hold my phone and also double as a selfie stick. I currently have a two-piece setup like these below.
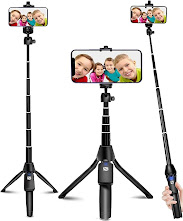
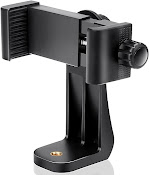
I need the second piece because I have a large phone and none of the default selfie stick tripod phone holders worked. Also, this mount is more durable than whatever comes as a default in other tripods.
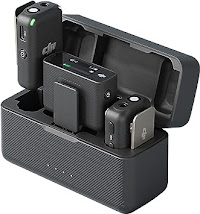
I also have the DJI wireless microphone that I mostly use when filming with a tripod, but not while riding, since the receiver adds a lot of bulk to my helmet camera.
I really like this wireless mic and I highly recommend it. It eliminates the echo sounds in a video. Also the battery life is about 12-13 hours and the case charges it too!
And that’s basically all I use to film my Moto Vlogs and regular travel Vlogs. I keep my setup super minimalist therefore super simple. Having too much equipment just creates more work for me in terms of lugging them everywhere and adds more work during the filming and editing process. When I used to film with 5 different camera angles, it took me days just to edit a video, because I’m having to transfer tons of footage.
I also do not upgrade my equipment if it keeps working flawlessly and the quality is great, unless something breaks.
This setup is simple and easy and keeps me wanting to produce content without the dread of creating tedious work. I hope this helps you in your vlogging journey. I had to do a lot of work researching all these things when I first started, so I put this together in the hopes that you do not have to go through all that trouble and you can begin your adventure today!
Check out two of my videos on Travel Vlogging:

AND

Disclosure: This Blog is reader-supported. This page contains affiliated links and we may get a small commission if you buy through links on our site. It will not cost you extra in doing so but it will be a great support for us. Thank you in advance.
I only bring a few items, but they are enough to create great videos. So let’s start from the top.
For my Helmet camera setup I use a chin mount with a GoPro.
I find this point of view (POV) has the best angle. Below is the chin mount that I currently use.
Prior to using this type of mount, I was using the Dango gripper mount,
which works perfectly, especially if you are renting helmets overseas. Because it’s an easy on and off clip mount.
But at some point I have decided to try a stick-on mount on my own helmet so that’s why I now have the stick-on mount. I like the new setup better because I have a better range of motion. With the Dango mount I can’t look down because the clip sticks out low under your chin and it prevents you from nodding your head down.
I do not have action camera preferences, but I do use a GoPro because it goes on sale and I like getting a deal. I use a generic media case to house the GoPro because if you use the GoPro Media Mod case it is difficult to switch out batteries when filming for a long period of time.
This is the case that allows you to switch batteries easily. This proves to be highly useful while on the road and you are continuously filming. I know that I can connect the camera to a power source but that means having to take a battery pack to my helmet which I do not want to do, or to be connected to the bike with a cable which can be a pain and could snag when I stand up.
(All images have clickable affiliated links. This is a reader-supported blog, so we get a commission when you purchase through the links provided.)
I always buy at least 3 sets of these spare battery packs when I change GoPros because I tend to film all day rides/moto camps/moto travel. Sometimes there’s just nowhere to charge your camera. I’ve had good luck with the Artman batteries shown below. They also have the enduro version which is supposedly longer lasting and has a better temperature tolerance range.
They do have the regular blue version as well if you prefer.
If you use this vlogging case instead of the media mod, you will need to use the GoPro Mic Adapter so that you can use an external microphone.
You most likely will need a TRRS to TRS microphone adapter in order for your external mic to work with GoPro. This external mic already comes with that adapter and works pretty well.
Now that the Helmet camera is set up. It’s time to show you my bike camera setup.
I used to have so many cameras mounted on the bike, but after the theft incident, I didn’t bother to replace most of my equipment. So now, I only mount one camera on the bike.
I use a DJI action camera, solely because I wanted to try a different brand.
This already comes with extra batteries. When I use my own bike, the cameras I mount on the bike are connected to constant power. However, when traveling and renting bikes, it is helpful to have spare batteries, but not necessary. As I do not usually keep that camera rolling all the time.
I use a RAM arm and claw 3 piece setup like these below to mount this camera on the handlebar.
This camera is usually set up on the bike but facing me, so that the viewers see me sometimes and not just the environment.
I also bring a drone to get epic scenery shots. I try to use it as much as I can to justify the weight, since it adds a bit of weight to my pack, but in certain places like National Parks and most tourist traveled places and the like, flying a drone isn’t allowed. Just keep that in mind.
I have the DJI Mavic Air 2 and it’s been working out fine for me, so I haven’t found a reason to upgrade.
If you fly them a lot, it would be helpful to have more spare batteries like these, because sometimes, there’s just nowhere to charge your drone batteries, i.e. when motocamping especially.
It’s extremely useful to pack a few of these portable chargers with you when traveling. There had been one too many times that I needed to recharge while on the road.
I also carry a portable tripod that can hold my phone and also double as a selfie stick. I currently have a two-piece setup like these below.
I need the second piece because I have a large phone and none of the default selfie stick tripod phone holders worked. Also, this mount is more durable than whatever comes as a default in other tripods.
I also have the DJI wireless microphone that I mostly use when filming with a tripod, but not while riding, since the receiver adds a lot of bulk to my helmet camera.
I really like this wireless mic and I highly recommend it. It eliminates the echo sounds in a video. Also the battery life is about 12-13 hours and the case charges it too!
And that’s basically all I use to film my Moto Vlogs and regular travel Vlogs. I keep my setup super minimalist therefore super simple. Having too much equipment just creates more work for me in terms of lugging them everywhere and adds more work during the filming and editing process. When I used to film with 5 different camera angles, it took me days just to edit a video, because I’m having to transfer tons of footage.
I also do not upgrade my equipment if it keeps working flawlessly and the quality is great, unless something breaks.
This setup is simple and easy and keeps me wanting to produce content without the dread of creating tedious work. I hope this helps you in your vlogging journey. I had to do a lot of work researching all these things when I first started, so I put this together in the hopes that you do not have to go through all that trouble and you can begin your adventure today!
Check out two of my videos on Travel Vlogging:

AND

Disclosure: This Blog is reader-supported. This page contains affiliated links and we may get a small commission if you buy through links on our site. It will not cost you extra in doing so but it will be a great support for us. Thank you in advance.


